

00:00 / 00:00
Success Storys
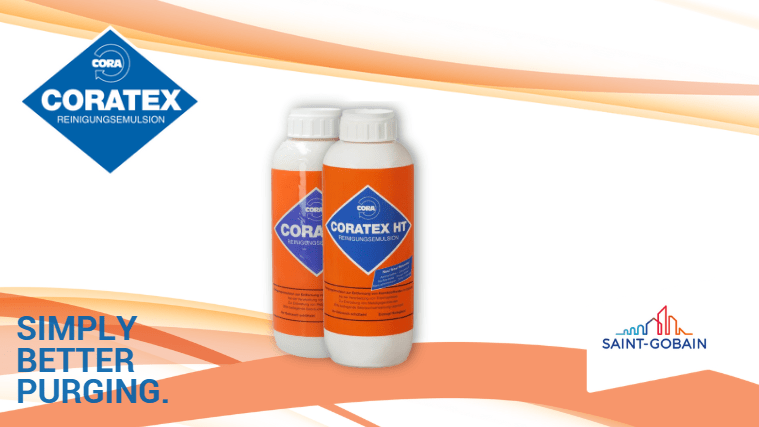
CORATEX HT
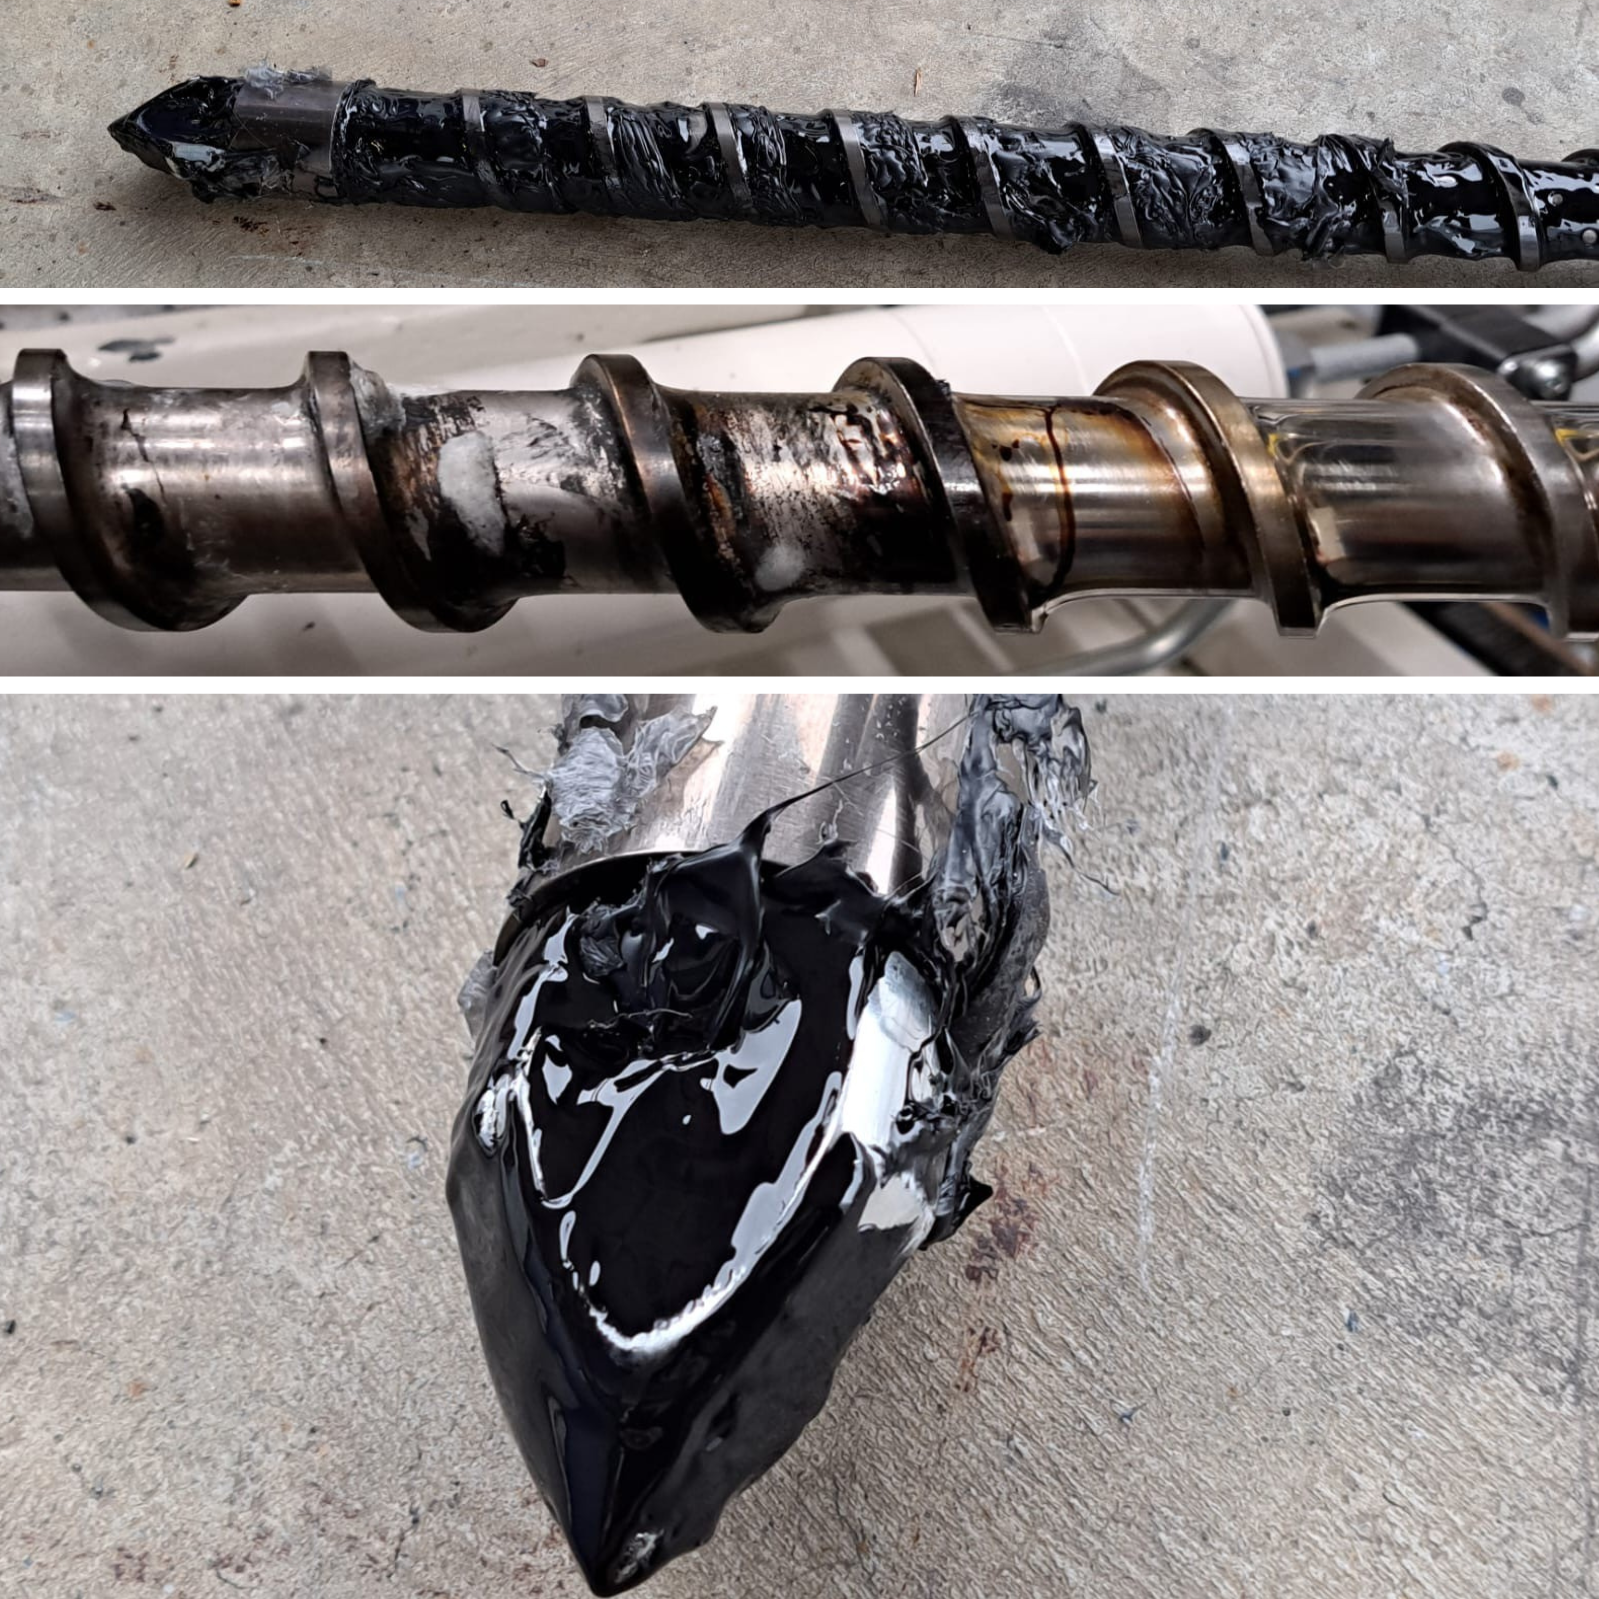
Test requirements: The test was performed during a tool/material change from black PE to natural POM on a 100/H27.
1. Screw removed and degree of contamination assessed
2.Screw installed without cleaning and machine prepared for cleaning. Temperatures set according to the ‘temperature-quantity overview’ and reduced by 10-20% of the required processing temperatures (POM).
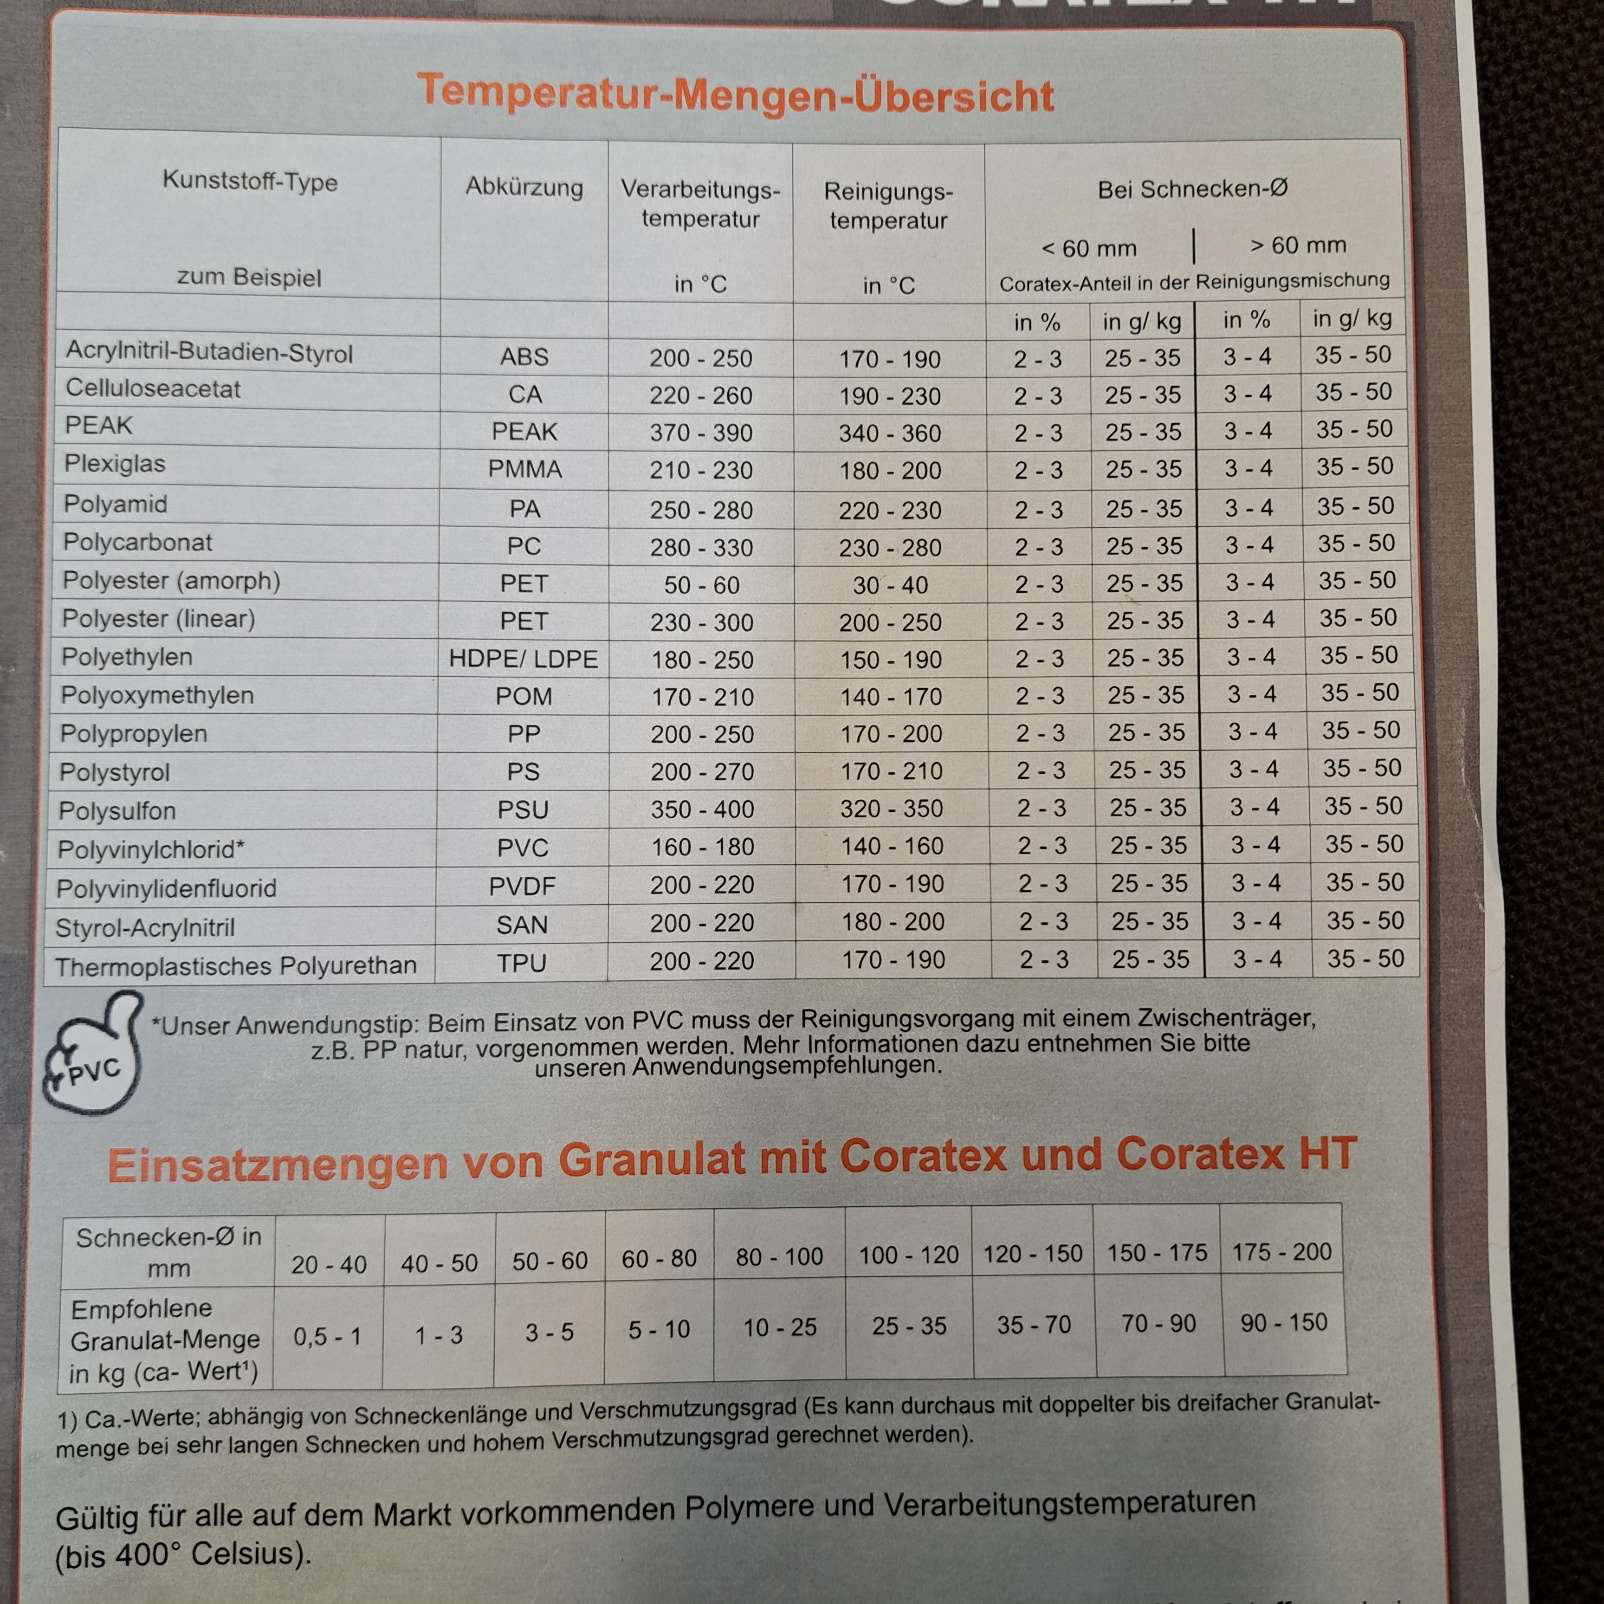
3. Cleaning granulate mixed according to the manufacturer's instructions. Before use, shake the CORATEX bottle well and mix with the plastic granulate (POM) to form a cleaning granulate.
4. Mix 2 kg of material (POM) with 60 g of CORATEX HT thoroughly, then reduce the extruder speed on the machine from 100 rpm to 50 rpm and use the entire feed volume.
5. Cleaning granulate was dosed and injected, repeating the process until the cleaning granulate was fully used up. Then, approx. 700 g (POM) unmixed material is injected through the cylinder for rinsing.
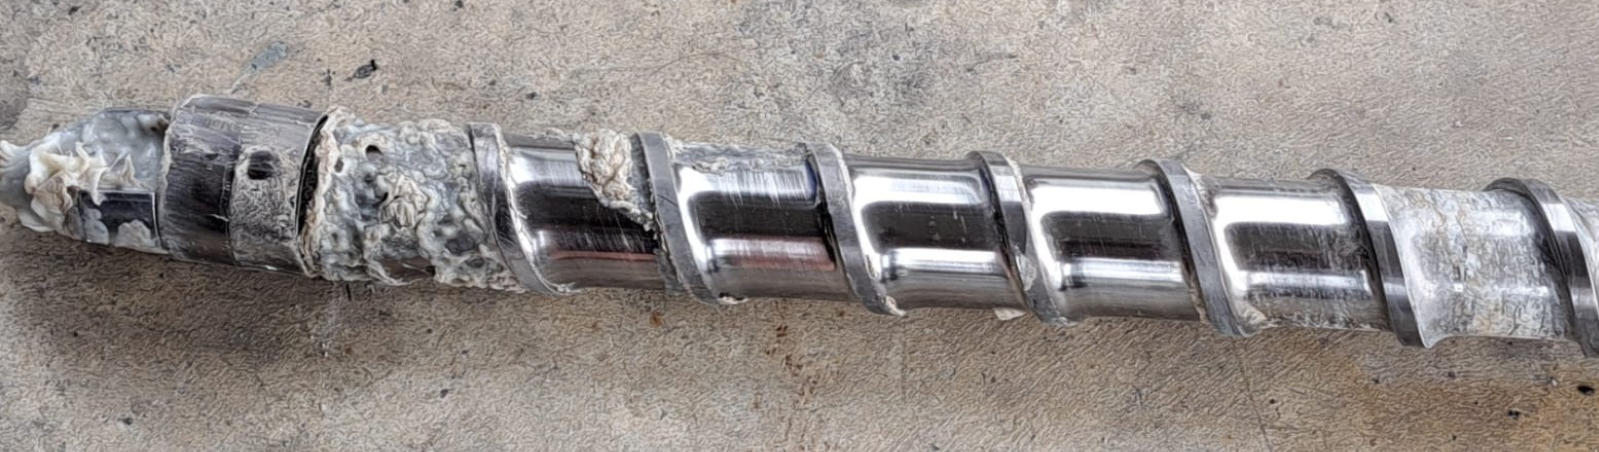
6. Screw removed again for inspection.
7. Repeat steps 2-6.
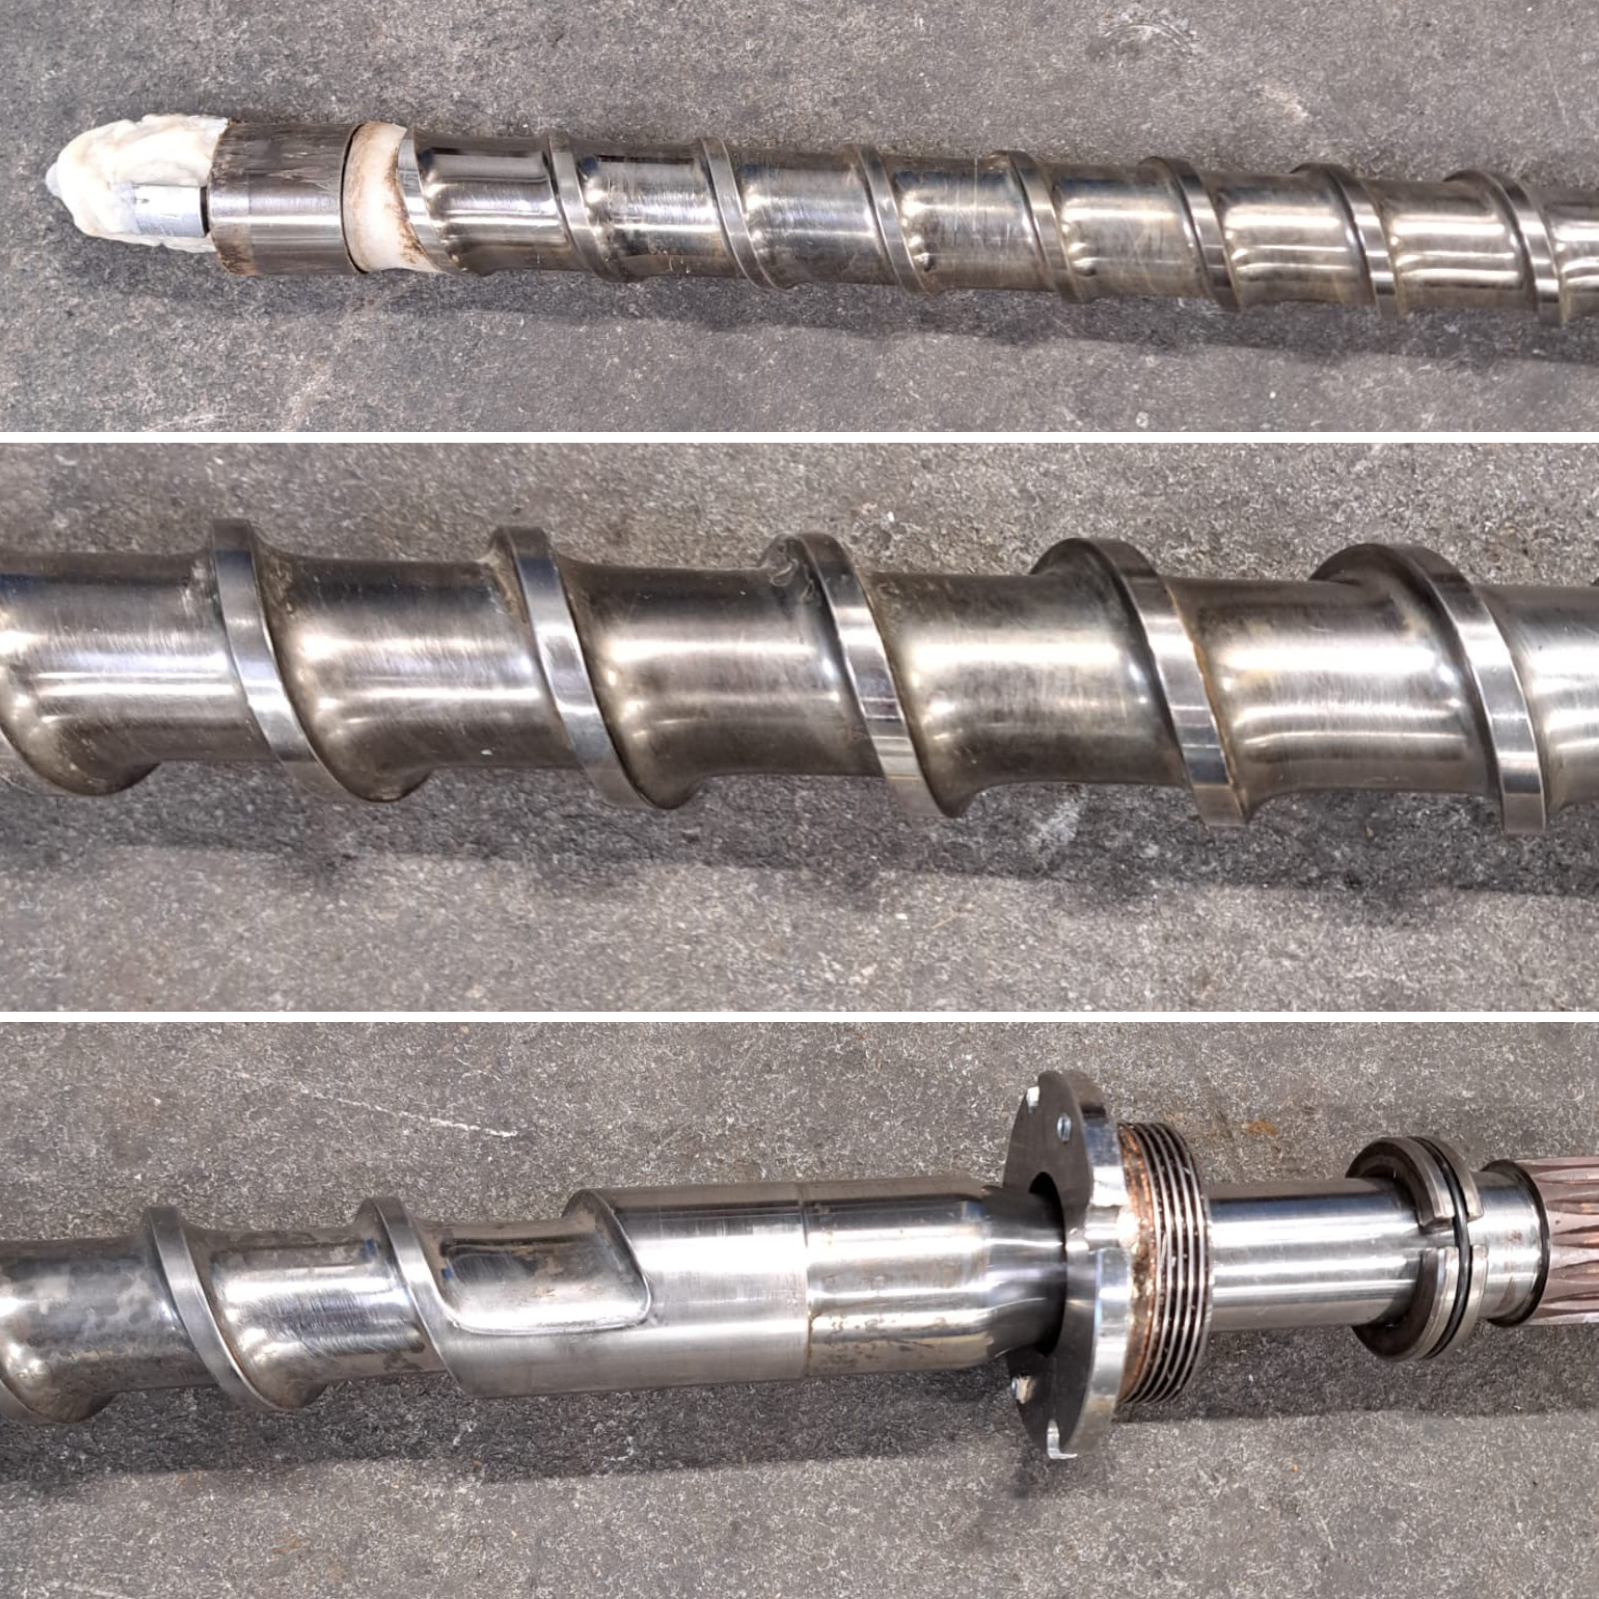
SUMMARY:
After a total of two cleaning procedures, the screw was completely clean. For future cleaning, the double amount of cleaning emulsion should therefore be used.
7 Schritte zur optimalen Reinigung
1. Preparation
Check your machine parameters and ensure free access of purge mix into the machine hopper.
The hopper should be free of loaders, driers and the like, to allow the purge mix to be fed directly onto the screw
2. Setting of purging temperature
Set purging temperature according to the specific type of plastic (approx. 10 - 20 % below Purging normal processing temperature, (see chart „Temperatures / Proportions”).
3. Preparation of the purging mix
- Always shake CORATEX bottle well before use!
- Pour 2 to 4 % of CORATEX into the plastic granules and stir or tumble well to obtain the purging mix (see chart “Temperatures/Proportions“).
Note: Do not overdose CORATEX; overdosing leads to feed problems (bridging!).
4. Purging
- Check whether set purging temperatures have been reached
- Reduce screw revolutions by approx. 50 %, if possible
- Run the prepared purging mix through the plastics processing machine and through the connected nozzles or tooling, if left on the machine. (Quantity: see chart „Quantity required of purging mix“)
- If necessary, correct the temperature in the screw area so that the mass comes out slightly flaky at the end.
5. Flushing
- After the cleaning granulate has passed through, pure plastic granulate is reused in the subsequent production process. Quantity: approx. 30 % of the cleaning granulate quantity.
6. Control
- Check the cleaning result. If there is still dirt, clean again with CORATEX (steps 2 - 5).
Note: If there is still contamination after the second cleaning cycle with CORATEX, we recommend cleaning the machine manually.
7. On completion
- Set all temperatures according to the plastic granulate provided below.